Re: Volume Indicators for MT4
1062ujtrader wrote: Sat May 16, 2026 9:00 pm Thankyou for this great invention!!!
wondering if you planning to make tick cci and tick adx also
thankyou

Re: Volume Indicators for MT4
1063- These users thanked the author ROI for the post (total 4):
- ujtrader, ChuChu Rocket, kvak, FXchaos
 Re: Volume Indicators for MT4
1064
Only for information, it is same like volume weighted ema.
BTW, nice work from you and thank you for your contributions....keep going
"fear moves faster than greed"
Re: Volume Indicators for MT4
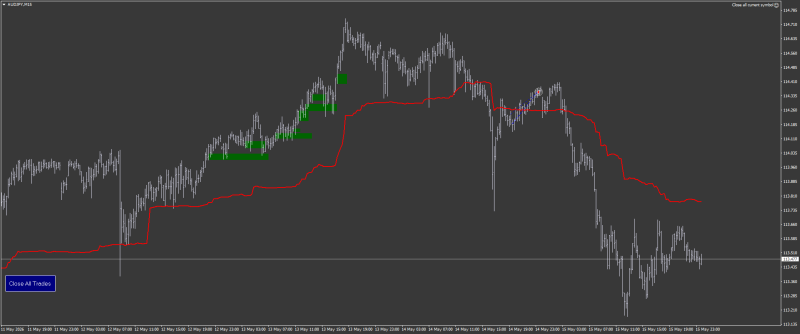
1065Thanks kvak, work in progress with True Ticks Something, but there are still issues.
Re: Volume Indicators for MT4
1066If still issues, better have editor open, so you can move indicator, I don`t know, it seems to be working.400 000- 200 000- 100 000
M1 and M5, so it looks same. You know.
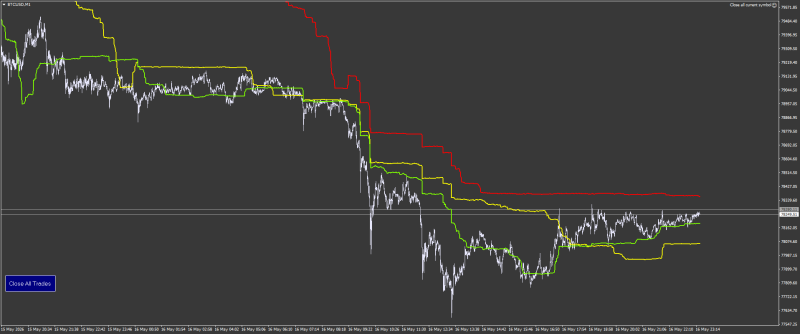
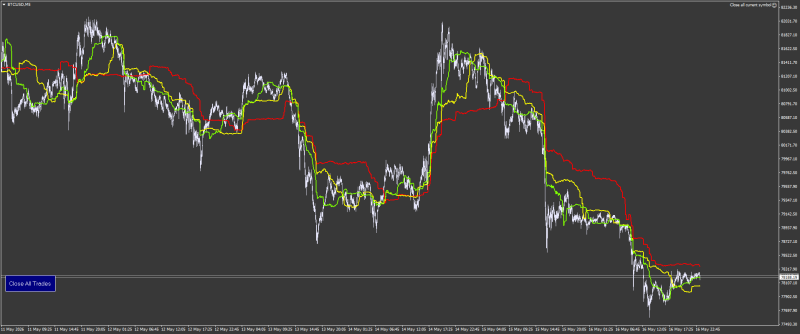
M1 and M5, so it looks same. You know.
Re: Volume Indicators for MT4
1068With bands too? Nice one ROI! Having a blast using your codes on the 5 minute charts. Are they strictly designed for lower timeframes only?

- These users thanked the author ChuChu Rocket for the post:
- ROI
Re: Volume Indicators for MT4
1069So, when it is pure ticks counting, timeframes does not matter, because same ticks are coming in every timeframe.ChuChu Rocket wrote: Sun May 17, 2026 11:29 am With bands too? Nice one ROI! Having a blast using your codes on the 5 minute charts. Are they strictly designed for lower timeframes only?
You see that vertical red line, it is in same place in M1 and M5, just changing timeframes does not change anything, if you need to change, so you have to change ticks count.
edit. so only these two last indicators is pure ticks counting indicators.
Re: Volume Indicators for MT4
1070Applying divergence principles to the **Sibbett Demand Index (DI)** takes the concept to a much deeper, institutional level.BeatlemaniaSA wrote: Tue Mar 17, 2026 7:51 pm Sibbet Demand Index (SDI)
The Sibbet Demand Index (SDI), also called Sibbet's Demand Index, is a volume-based oscillator indicator. My favourite Volume indicator.
Unlike standard momentum oscillators like the RSI or Stochastic—which only measure rate of change in *price*—the Demand Index is a **leading volume-to-price proxy**. Developed by James Sibbett, it uses a complex formula combining price change, volume, and volatility to measure the buying pressure (demand) versus selling pressure (supply) entering an asset.
Because it tracks the *liquidity* driving the move rather than just the candles on the chart, divergence on the Demand Index is significantly more reliable than standard oscillators. It shows you when smart money is pulling the plug on a trend, even if retail volume is keeping the price afloat.
---
## Honest Opinion: The Demand Index Advantage (and the Catch)
My honest take here is a bit more optimistic than with the RSI, but with a major technical caveat.
**The Good:** Demand Index divergence is far more powerful because volume precedes price. When a price makes a higher high, but the Demand Index makes a lower high, it means **the market is rising on lower institutional participation (institutional distribution)**. It’s like a car accelerating uphill while running out of gas.
**The Catch:** The Demand Index can be incredibly erratic and "choppy" on lower timeframes (anything below the 1-Hour chart) due to how it processes volume spikes. Furthermore, because it oscillates around a **Zero Line** (representing a perfect balance of supply and demand), it can stay pinned above or below zero for long stretches during heavy institutional accumulation or distribution, trapping early counter-trend traders.
---
## Deep Summary of Demand Index Divergence
When trading the Demand Index, the zero line acts as a crucial line of demarcation. The index values fluctuate between positive territory (buyers in control) and negative territory (sellers in control).
### 1. Regular Reversal Divergence (Sibbett Style)
This occurs when the price action moves into extreme territory, but institutional capital flow (the volume-price ratio) refuses to back it up.
* **Regular Bullish DI Divergence:** Price drops to a **lower low**, but the Demand Index establishes a **higher low** (often while still negative but curling back up toward the zero line). This indicates that institutional selling pressure has dried up despite the lower price tag. Smart money is starting to accumulate.
* **Regular Bearish DI Divergence:** Price pumps to a **higher high**, but the Demand Index stalls out and puts in a **lower high**. This reveals that the breakout is being manufactured on thin retail volume while large players are quietly distributing their bags.
### 2. Hidden Continuation Divergence (The Institutional Reload)
This is arguably the most potent way to use Sibbett’s indicator. It highlights institutional players "buying the dip" or "shorting the bounce."
* **Hidden Bullish DI Divergence:** During an uptrend, price makes a **higher low** (a standard pullback), but the Demand Index plunges to a **lower low** (often dipping sharply toward or just below the zero line). This means the market cleared out weak-handed retail buyers, resetting the indicator's institutional volume metrics, while the structural price floor held firm. It screams trend continuation.
* **Hidden Bearish DI Divergence:** During a downtrend, price dead-cat-bounces to a **lower high**, but the Demand Index surges to a **higher high**. This indicates aggressive institutional shorting into temporary retail buying liquidity.
---
## The Strategic Blueprint: The "Zero-Line Filter" Strategy
To build a robust trading strategy using Demand Index divergence, you cannot just trade the peaks and valleys blindly. You must incorporate the **Zero Line** as your structural confirmation.
Here is how a professional framework looks for a **Bullish Reversal** setup:
### Step 1: The Setup (Context)
* **Timeframe:** 4-Hour or Daily chart.
* **Price Location:** Price drops into a major historical support zone or a key Fibonacci retracement level ($61.8\%$ or $78.6\%$).
### Step 2: The Identification (Divergence)
* Price prints a sharp **lower low** into the support zone.
* The Demand Index refuses to make a lower low, instead printing a clear **higher low** deep in negative territory (below 0).
### Step 3: The Trigger (The Zero-Line Cross)
* **Do not enter yet.** Wait for the Demand Index to cross **above the Zero Line**.
* A cross above zero confirms that buying pressure has officially overtaken selling pressure.
* Simultaneously, look for a price structure trigger, like a breakout above the local swing high on a lower timeframe (e.g., the 15-minute or 1-hour chart).
### Step 4: Risk & Trade Management
* **Stop-Loss:** Placed just below the recent swing low of the price structure.
* **Take-Profit:** Target the next major institutional liquidity pool (prior swing highs or major resistance). Because volume-backed reversals tend to be violent, aim for an asymmetric risk-to-reward ratio of at least $1:3$.
---
## Crucial Execution Tips for Sibbett's Index
* **Watch the Extremes:** The most explosive regular reversals happen when the first peak of the divergence forms at an extreme reading on the DI (highly positive or highly negative) and the second peak forms much closer to the zero line.
* **Beware of "Smooth" Settings:** Ensure your charting platform calculates the Demand Index properly using actual volume data. Be careful using it on assets without centralised volume (like spot Forex) unless you are using reliable tick volume or futures data (like 6E or 6B contracts). It works best on **Stocks, Commodities, Indices, and Crypto**.
Millionaire Maker - “Amateurs chase. Professionals wait. Legends wait with a plan.”
BEATS V5 - "Enjoy The Quiet Between Trades”
Improve Your Trading Psychology - No fear, no doubt
Ultimate Risk Management - Maximize Your Trades
Supply and Demand Course - Learn Supply and Demand
Believe That You Can - Believe That You Can
BEATS V5 - "Enjoy The Quiet Between Trades”
Improve Your Trading Psychology - No fear, no doubt
Ultimate Risk Management - Maximize Your Trades
Supply and Demand Course - Learn Supply and Demand
Believe That You Can - Believe That You Can
 Smc_Extended with one
 Screenshot_799.png